Feature
●This is a high quality Arcade DIY Kit for Starter. You can build The kit will bring your back to 80s & 90s Arcade Game Experience..
●Build your own arcade game machine with these accessories, enjoy the fun of home game console. Its also a perfect gift for the kids.
●Perfect for 1 player arcade DIY game project on Windows Systems & Raspberry Pi 1/2/3 with Retro Pie Systems.
●Fit mount in 1-1/8" hole, easy assemble! Just connected the push button and joystick.
Description

Product Description
- The encoder support all the windows systems!
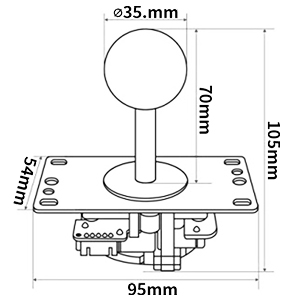
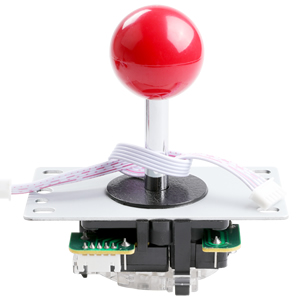
- The Joystick is a 8 way professional joystick!
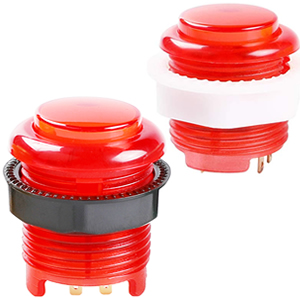
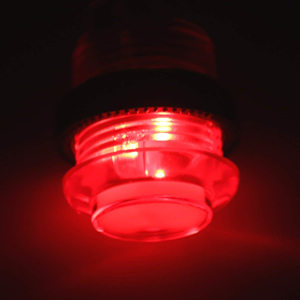
- The buttons are 5V LED Illuminated push buttons with build-in Microswitches inside.
- The buttons default as lighted all the time.
- These Fit the Standard 1-1/8" Control Panel Button Holes.
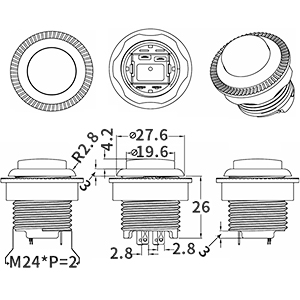
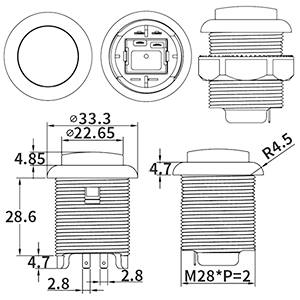
- Joystick and small button hole diameter: 24mm-28mm,large button hole diameter: 28-33mm
- This item is for 1 players DIY Project.If you want to build a Multiplayer Machine,Please select the quantity of the item.
Compatible model
Win8/Win7/Vista/XP/2000/98, Linux, MAC OS, Android. Raspberry Pi 1/2/3/3B Retropie Arcade DIY Projects,USB MAME cabinet arcade DIY projects & PC controller computer game etc.
Package Includes
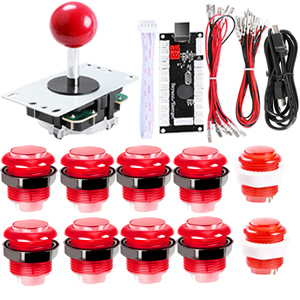
- 1x Zero Delay LED USB Encoder
- 1x USB Cable
- 1x 5Pin wires for Joystick
- 10x 2Pin wires for LED Push Buttons
- 10x Red LED Push Buttons (2pcs small, 8pcs big)
- 1x Red 5Pin 8 way joystick
- 1x 10 terminal 2pin wires for led lamp
- 1x User Manual
Parts Details
|
|
|
|
|---|---|---|
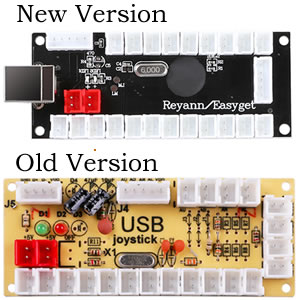
We Updated USB Encoders
|
Professional Joystick
|
Arcade Button
|
|
|
|
|
|---|---|---|
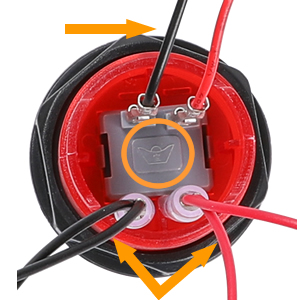
Button Connection Display
|
LED IlluminateThe button is set to light all the time. The maximum voltage is 5V. Do not use more than 5V of voltage, otherwise it will burn the button !! |
5 Pin Cable SlotThere are 2 5Pin Slots on the encoder board. But only the slot opposite the USB-B is used for joystick. Its very important!! |

Installation Diagram

Parts Specification
|
|
|
|
|---|---|---|
Joystick |
24MM Arcade Button |
30MM Arcade Button |